Tuesday, March 20, 2012

A Pinteresting Update


I’ve been working on my own personal Pinterest challenge since last week, albeit very slowly.  My goal was to do something with the stash of wine bottles that use to live atop our kitchen cabinets but currently have a home under our piano.


First task was to clean and peel the labels off of the bottles.  I found a tip on Pinterest that if you heat your oven to 175 degrees and “bake” the bottle for 7-10 minutes the glue should melt and the label should peel off easily.  So I tried it.


It worked very well for some, not at all for others.  At first I thought I had found a correlation between price and peel-ability, not so.  Then I thought it had to do whether or not the label had a shiny laminated coating, nope.  Or maybe it’s the thicker labels that peel off more easily, or not.   Yeah, I have no clue why some labels peeled better than others.  Even with the bottles with easy to peel labels, I was still left with a sticky haze of glue on the bottles. Enter Goo-Gone!


This stuff is amazing!  With a dry rag and Goo Gone you can easily remove any adhesive residue from surfaces.  It worked really well on the glass wine bottles.  I was left with clean, shiny wine bottles, now what to do with them?

 
Using Pinterest for inspiration I decided to try making soap dispensers for our kitchen, one for hand soap and one for dish soap.  The two bottles that I selected are similar heights, but vary in their shape.  They also both have the screw top which will be nice for adding the pump dispenser.

After selecting the two bottles I picked out two shades of blue-green spray paint.  I had one left-over bottle and found the other lighter shade at Walmart.  For our accent colors in the kitchen I have decided to go with varying shades of blue-green (teal, aqua, turquoise, mint, what have you).  The layering of similar colors really appeals to me rather than being too matchy-matchy.  I feel like it gives it a more “collected” look rather than an “I just went to Target and bought all matching accessories” look (which I kind of did originally with the teal, ooops!)

I applied three light coats of paint to each bottle, allowing them to dry an hour in between each coat.

 After 2 coats

And here they are after three coats of paint and a night of drying.


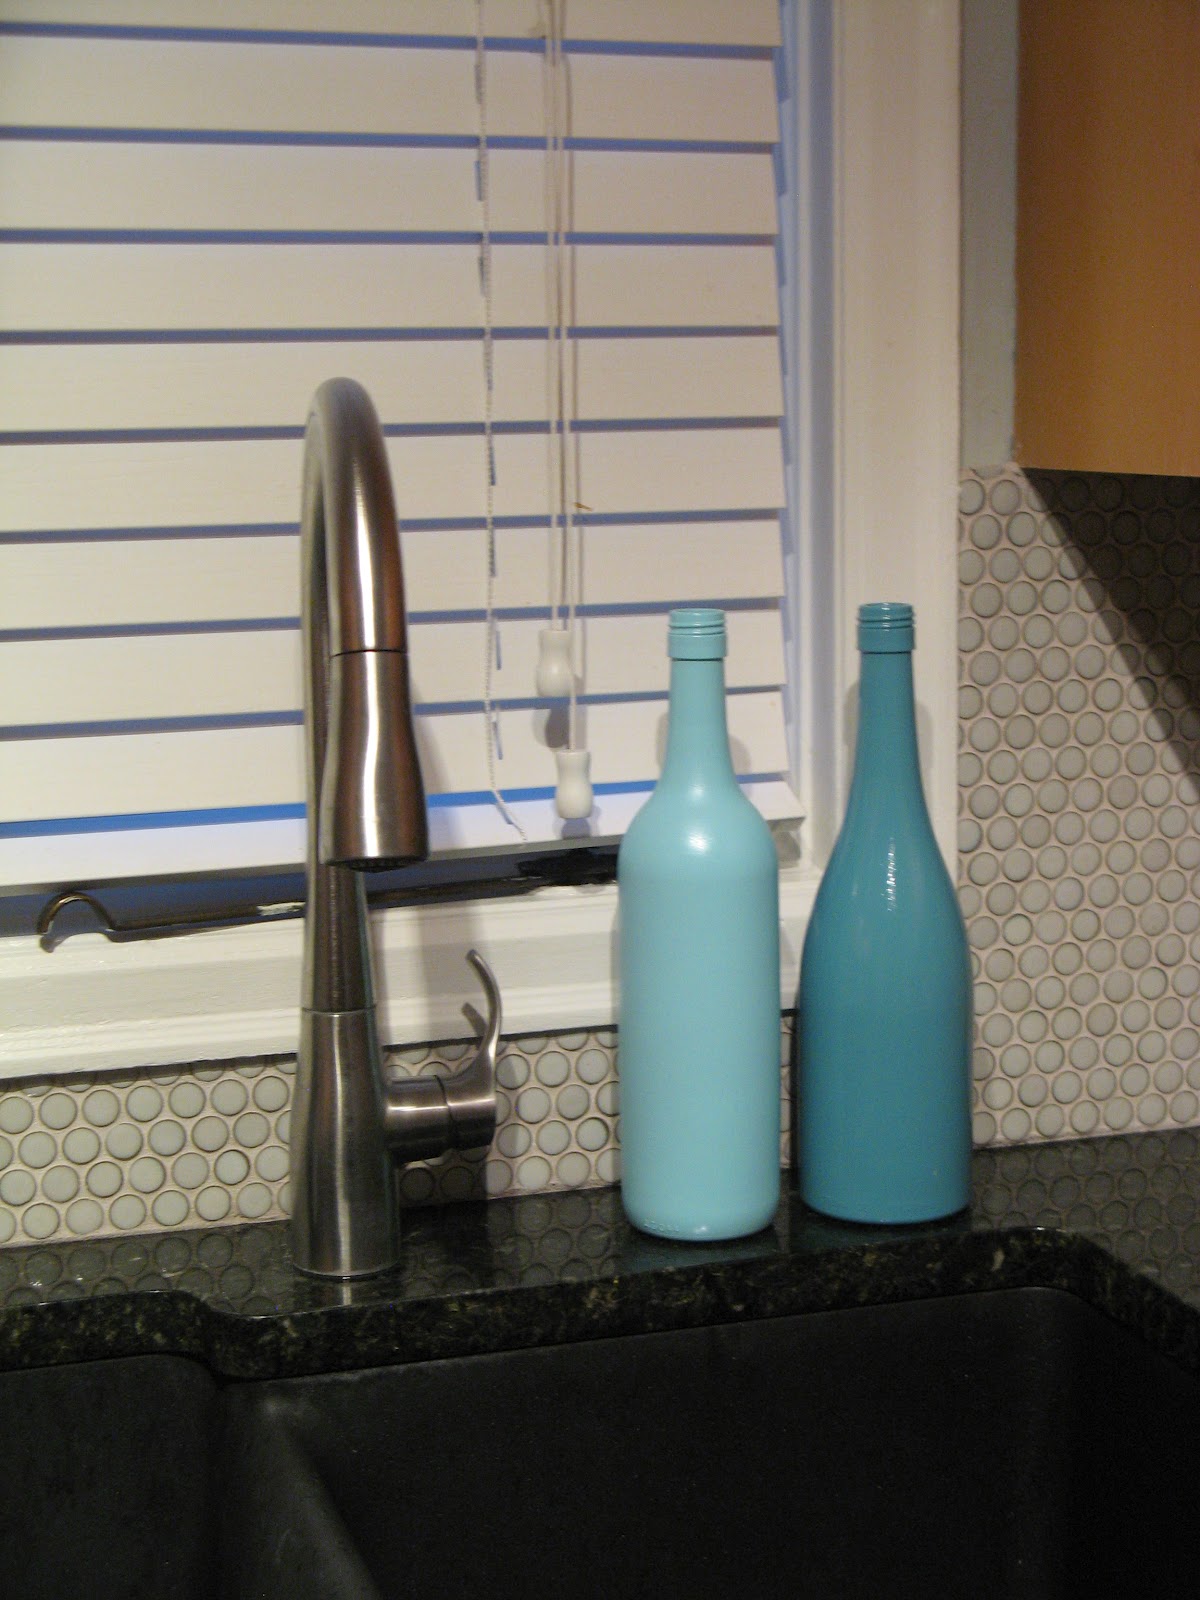
You’ll notice that I’m still missing an essential feature, the soap pumps.  I believe that my current shampoo and conditioner bottle pumps might do the trick, but I think I’ll wait until their empty before I steal them for this purpose.  I also want to add another detail to the bottles, but that will have to wait for another post!

While I began the wine bottle project I also added another Pinterest project.  Last week I was inspired by this post on Pinterest.


Our current wooden spoon situation in our kitchen is rather sad, so I figured cheap and cute wooden utensils were in order!  Saturday morning, while out in search of aqua spray paint, I decided to pick up a few other blue-green hues for my kitchen utensil project.


At Home Depot I found four bottles of clearance Martha Stewart sample paint in “Araucana Teal” ($0.50 each!) so I quickly grabbed those.  I also found teal Rustoleum spray paint at Home Depot that I couldn’t pass up.  I stopped by Walmart scored a few bottles of sample paint in shades of mint-green, as well as aqua “Blue Ocean Breeze” Krylon spray paint.  While browsing the clearance section of Walmart I spotted a set of two heavy-duty wooden spoons on clearance for $7, along with a set of five bamboo utensils for $5 (regular price).


While I had my paint clothes on I decided to tackle the two projects at once.  After I had sprayed the first coat on the wine bottles I started lightly sanding the handles of the utensils, and cleaned them with a damp cloth after.  I then used painters tape to tape off the section I wanted to paint.


To protect the tops I wrapped each with a plastic sandwich bag and sealed it with more tape.  Then I applied my first coat, one color for each utensil.  Some were spray painted, others brushed.  Some had matte finish, others glossy.  I like the variation.


I did three light coats of paint and allowed them to cure overnight.  Here is the final (well, almost) product!


I still have to spray the painted utensils using a non-toxic shellac, but due to recent rainy days I’ll have to wait to officially finish these two projects.

Oh, and while I’m at it here’s one last project for good measure!  Winston’s doggy wipe container before and after (English bulldogs are notoriously messy, drooly, and gross).  


I covered the lid about a month before with a fabric scrap and Modge Podge but I thought the bottom needed a little spicing up!

Before

 After

And there you have it!  A weekend of kitchen accessory painting projects inspired by Pinterest.  I’ll post an update once I have some soap-pump action in here!

Oh, and yes I realize that I have used only two of thirty-plus wine bottles, but at least that's a start, right?

Wednesday, March 14, 2012

What a Pinteresting Idea

I have failed miserably as a newbie blogger.  I missed out on The Pinterest Challenge by Sherry of YHL last week.  I feel like as a new blogger this is one way for me to feel more connected to other DIY bloggers out there, and I missed my opportunity.  I did have a lot of good excuses for being busy this weekend (helping out with a wedding at church Friday and Saturday, bridal show with friends on Saturday, and celebrating Grandma’s birthday Sunday, an overall great weekend!).  Because I missed out, I am determined to have my own personal Pinterest Challenge this weekend.

For those of you unfamiliar with Pinterest it’s only the most addicting website ever.  It’s basically a place where you can browse ideas and “pin” them to your boards of various topics.  For me it’s a great way to archive different DIY and craft ideas as well as recipes and inspiring home décor.  In short, I love it, I’m addicted.

The problem with Pinterest is it’s easy to pin but a lot more difficult to actually get off the couch and start making things inspired by the things that you pin.

Enter the Pinterest Challenge.  Sherry of YHL along with three other noted bloggers were hosting a Pinterest Challenge (Part III) this past week.  Everyone who participated in the challenge along with them posted their completed projects on the YHL blog.  It’s really amazing and inspiring to see all of the creativity out there! 

Well, before I closely read the details of the challenge, I got excited and posted a link to my herringbone kitchen wall that was inspired by Pinterest.  After re-reading the challenge I realized it was suppose to be a project complete in the last week…ooops!  Now the guilt is setting in and I’m determined redeem myself and do a new Pinterest Challenge of my own.

Here are a few things I am currently inspired by on Pinterest:


Sense a theme?  Now behold the stash of empty wine bottles currently housed under our piano that is compelling me to do something.


Sunday, March 4, 2012

Check, Check, Check, and Check!

I think the list idea actually worked!  Or maybe it was the fact that I blogged my list for the public to see so I guilt myself into checking off a few items this weekend.  Either way, something worked and I can now officially cross four items off of my list.

1.  Move old pantry cabinet to my parent’s house


This was easy.  My parents had already offered to take our old pantry cabinet that was still in good shape, and after reminding them of it last night at dinner they happily stopped by to pick it up this afternoon along with our clothes rack that we no longer needed from our laundry room.  Thanks, Mom and Dad!

2.  Spruce up bookshelf in living room

I’ve been meaning to do something to the back of the bookshelf in the living room ever since I added fabric to the bookshelf in our dining room last Fall.  I had purchased this pair of Billy bookshelves at IKEA at few years back.  Just making a few minor adjustments can turn a big-box store item into something a little more special.  The basic white handles were replaced with clearance hardware from Anthropolgie, and I added leftover fabric from the dining room roman shade to the back of the bookshelf.

Before

After

This went pretty smoothly so I wanted to do the same for the identical bookcase in the living room.

Before

The first step involves removing the cardboard backing.


I then had to decide what IKEA fabric I wanted to cover the backing with. 


I could have used wallpaper or paint to cover the back but since I have an over-abundance of fabric this was the obvious choice for me.  I decided on the dandelion fabric since the pattern was the perfect size for the bookshelf.  After choosing the fabric I cut it to size leaving a few inches on each side to fold over the back.


Now here comes the very technical part.  Duct tape, yes, duct tape.  Just fold over the fabric around the back and secure with duct tape.  Since the back of the book case is to the wall no one will ever know (except all of you!).


Here’s what the backing looks like covered.


I then slipped the backing into place and nailed it at the bottom.  It is a snug fit with the fabric wrapped around but with a bit of finagling I got it in.


Now for the finished bookcase.

 After
After

I think it adds more depth and helps the items in the bookcase to stand out.

3.  Reupholster bench in master bedroom

This bench has been with me since high school.  My mom and I bought it at Lowes for around $25, it was unfinished pine, unassembled and came in a kit that you were suppose to paint with a giant American flag.  I ended up staining it a dark walnut color instead of the Americana paint treatment.  A few years ago I turned it into a padded bench with foam and covered it with fabric.


At the time it matched the duvet cover and throw pillows, but I’ve since bought new bedding.  I had bought fabric from West Elm last year to reupholster our $5 Craigslist office chair and bought an extra yard for the bench.  It took three months for the fabric to get here, but it was worth the wait.  I love how it matches the throw pillow I purchased at West Elm last summer.


To recover the bench I first had to remove the hinges and then remove the fabric.


Usually one is suppose to use batting to cover foam for upholstery, but I had leftover fleece that I had used instead.  The foam and fleece were still in good shape so I was able to reuse it as is.


After ironing and cutting the fabric to size I centered the seat on the fabric and began stapling.


Around the screw holes I cut out a small hole in the fabric so the hinges could be reattached.


I continued around the edges pulling the fabric tight and stapling.


I then reattached the hinges to the seat.


And here’s the finished bench.

After

 After
 
4.  Make new pillow covers for Spring

So, I cheated with this one.  I removed the wintry plaid covers to reveal the original pillows.  For now, it’s bright and springy enough for me!

Before

 After
 After
After

I am hoping this streak of motivation continues this week!