Hope everyone was able to enjoy their Thanksgiving day with family and friends! Jason and I hosted my family at our house, which is actually the fourth time hosting the big Turkey day for us. This also makes the second time we have prepared a mostly-vegan meal. My family helped out a lot this year and brought the turkey plus many side dishes and pies. I tackled most of the side dishes and made almost everything vegan-friendly for my brother and I. We of course ended up with twice as many dishes as we had people, and we took pictures of everything but the food.
Thanksgiving Menu 2012
Food Brought & Bought:
Turkey - not vegan, made by Mom and Dad
Turkey Gravy - not vegan, made by Mom
Turkey Stuffing - not vegan, made by Mom
Organic Pumpkin Pie - vegetarian, made by Mom
Pumpkin Pie - vegetarian, provided by Ken
Green Beans with Slivered Almonds - vegan, made by Mom
Chia Seed Pudding - vegan, made by my brother
Triple Berry Pie - vegetarian, from Wheatfields
Crescent Rolls - vegan, believe it or not
Food We Made:
Mashed Potatoes -vegan
Thanksgiving Gravy - vegan
Wild Rice Stuffing - vegan
Hippie Loaf - vegan
Corn Dish - vegan
Cranberry Sauce - vegan, no sugar added
Bread Stuffing - vegetarian
Apple Walnut Stuffing - vegetarian
Scalloped Carrots - vegan
Thyme-Braised Brussel Sprouts - vegan
Coconut Whip - vegan
Like I said, lots of food! And everything turned out fairly well (although the hippie loaf could have been a little more browned). I've linked to the recipes for some of the dishes above. Here are a few tips for...
Veganizing your Thanksgiving without too much trouble:
1) Use vegetable broth instead of chicken broth or turkey drippings for your stuffing.
2) Use almond, soy, rice, or hemp milk to make your mashed potatoes creamy.
3) Use vegan stick butter (Earth Balance) instead of butter.
These simple switch-outs will make most of your dishes vegan-friendly for those certain family members. Here are some of our favorite recipes that I created vegan versions of:
Corn Dish
4 round tsp Ener-G with 6 Tbsp warm water
3/4 cup flour
3/4 cup cornmeal
3 Tbsp sugar
4 tsp baking powder
1 tsp onion powder
1/2 tsp salt
3/4 cup canned pumpkin
1 can corn (with liquid)
1 can creamed corn
1/2 stick melted vegan butter
Mix the above ingredients together and pour into a greased casserole dish. Bake at 350 degrees for 50 minutes to 1 hour until golden brown.
Scalloped Carrots
5-6 carrots peeled and chopped into 1/2 inch pieces
1/2 onion chopped
1 Tbsp olive oil
4 Tbsp vegan butter
4 Tbsp flour
1 1/2 cup almond milk
1/4 cup nutritional yeast
1 Tbsp soy sauce or tamari
1 tsp garlic powder
Fried Onions
Boil carrots until slightly tender, do not over-cook. Meanwhile saute onion with olive oil, set aside. In a saucepan over medium heat melt butter and whisk in flour, making a roux. Add milk, nutritional yeast, soy sauce, and garlic powder. Heat until thickened, add more milk if too thick. Once at desired consistency (similar to creamed soup) mix together with onion and carrots, pour into a small casserole dish. Top with fried onions. Bake covered with foil for 30 minutes, then remove foil for 15 minutes until browned.
And finally I have a few...
Time-saving tips for any type of Thanksgiving meal:
1) Chop all onions, celery, mushrooms, carrots, etc. the night before and portion into containers/plastic bags for each dish.
2) Roast your potatoes in your crockpot on low setting starting that morning. An hour before meal time, mash the potatoes in the crock and turn it to warm setting. Serve out of the crockpot.
3) Make as much of a dish as you can ahead of time without cooking all the way through. Do the final baking in the hour or two before meal time (ex. stuffings, scalloped carrots, hippie loaf).
4) Make a list of all of the dishes you are preparing so you can check things off as you go. You can even go so far as to make an "oven schedule" to coordinate your precious oven time.
5) Do dishes as you go along. It is helpful to have a wonderful husband who is willing to take on this task.
6) Don't say no to help. If someone offers to bring something, say yes!
Everything came together fairly well. There was of course that last hour of craziness in the kitchen trying to keep everything warm, but we succeeded! My brother even brought over his harmonium and treated us to a little pre and post-dinner entertainment.
I tried my hand at the harmonium as well. It's kind of like mini organ or an accordion that you sit on your lap or the ground.
We had a great time! Thanks to my wonderful husband for not only being the dish-washing fiend, but for photographically documenting the evening. I feel so lucky and blessed to have family close by to celebrate the holidays with! We were sad we missed out on the Brewer Thanksgiving, an annual tradition where they invite over all of the international faculty and students in my father-in-law's department that do not have family to celebrate with. It seems "non-traditional" to most but it really is what the spirit of Thanksgiving is all about. Happy Thanksgiving to all of our family and friends we were not able to celebrate with!
Friday, November 23, 2012
Tuesday, November 20, 2012
Hitting the Bulls-Eye!
I have always said how much I love Target clearance, but
until a few weeks ago my Target clearance luck had dried up. I had begun to lose faith in my beloved
hidden back-row end-caps. My luck
changed at a recent trip when I happened upon the mother-load of Target
clearance, and in my post-dentist, Novocain-induced state I was more than happy
to treat myself.
My first find of the day was this fabulous matte gray
silicone Michael Graves spoon rest for…
$2.98! We were in
desperate need of a new spoon rest that wouldn’t stain unlike our old white melamine
one, so this fit the bill.
Next I happened upon two rugs, one runner for our entryway
and one larger reversible rug that would work for our downstairs bathroom.
Each rug was less than $8!
I know I have a throw pillow problem, but it was so hard to
resist these two…
Especially at $17.48 and $5.98!
I have been pining after a sunburst style mirror for years
now, and finally I found one…
It was only $20.98!
Can’t say no to that.
Finally I found this textural ceramic table…
For only $20.98!
Secretly it was not the possibility of the clearance section
that brought me to Target that day, it was the lure of Nate. Many of you probably know that Nate Berkus
recently launched a limited-time line at Target with a lot of amazing natural
and eclectic accessories for the home. I
had to indulge…
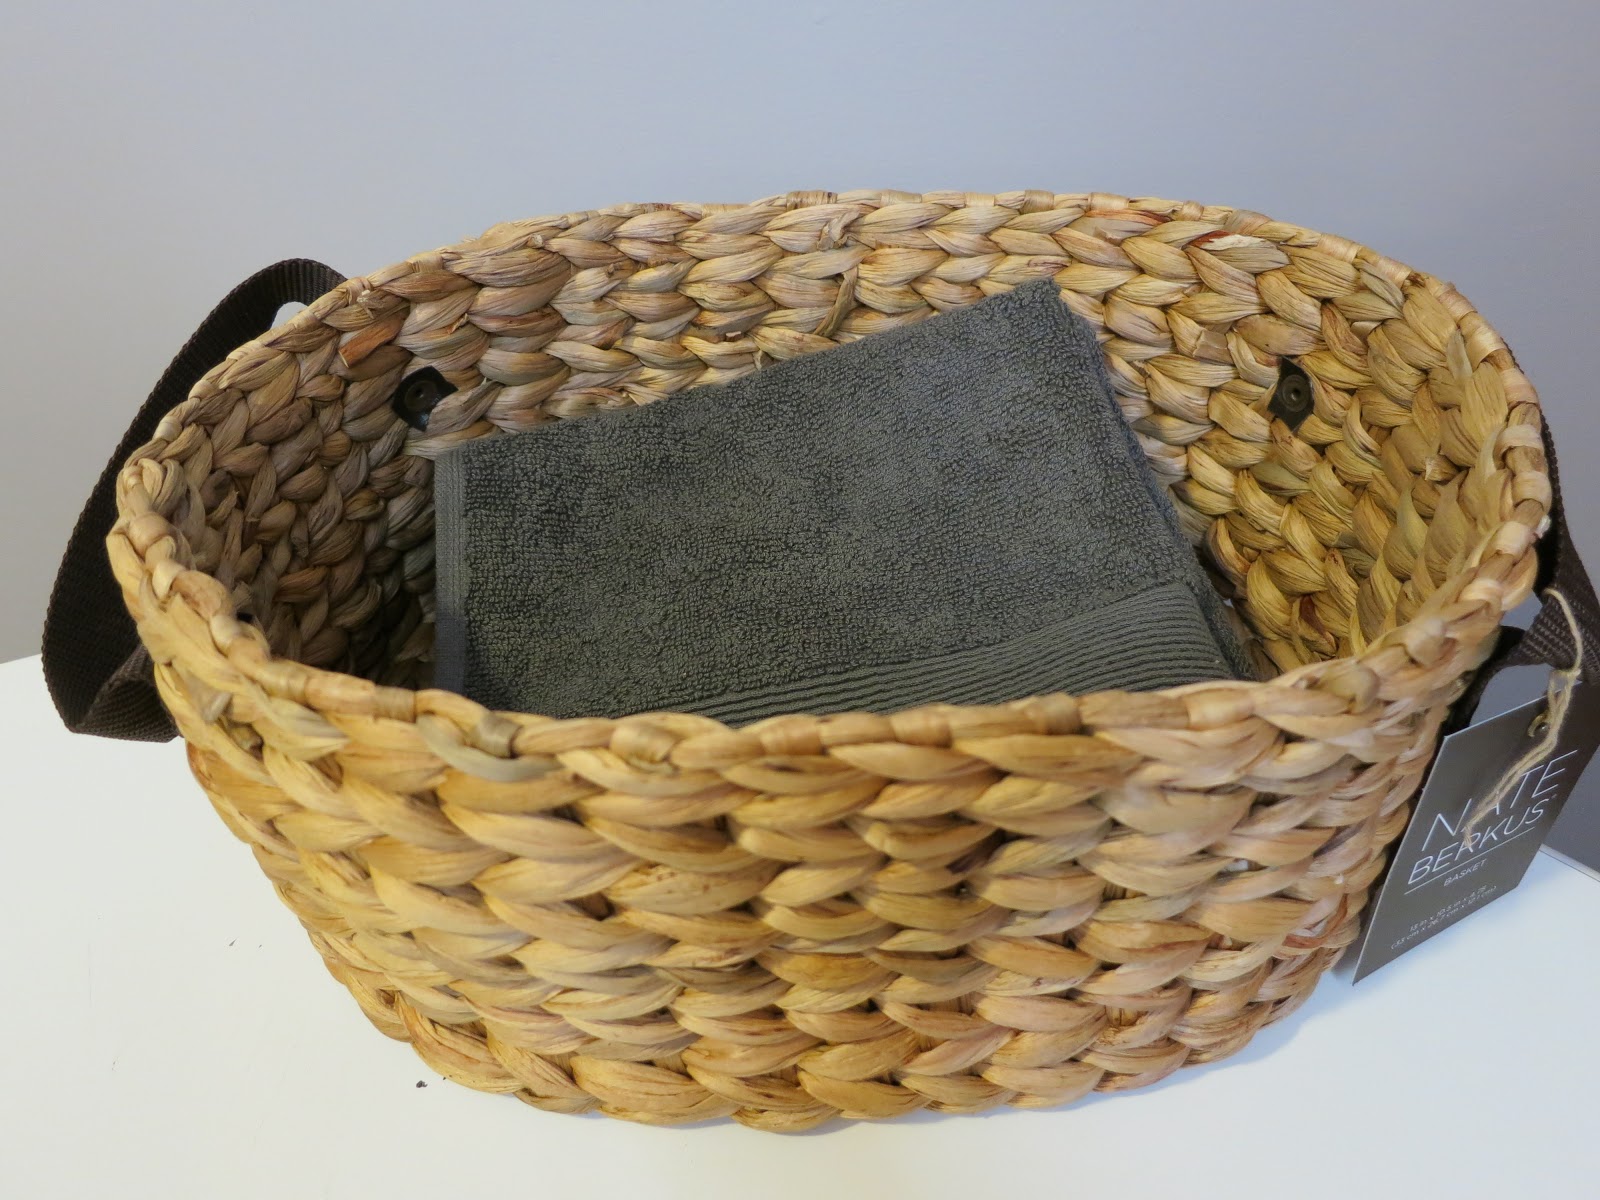
I paid full-price for the graphic patterned bath rug,
natural basket, and graphite hand towel, but it was worth it for a little piece
of Nate. Here is a shot of the clearance
finds with the Nate finds. I had a
basement bathroom redo in mind…
When I buy clearance items now, I always try to have a place
or use in mind for the item. If not, I
don’t buy it. It’s just a waste of
money, not a clearance savings if the item just sits around. I’ve learned this the hard way over the
years!
While clearance shopping keep in mind that some items may be
easily changed with a cheap can of spray paint or another quick fix. Don’t be afraid of a few scratches or dings,
a lot of times you will be the only one to notice once that scratched picture
frame is hanging up. So go forth and find your own clearance deals! (just save the good stuff for me)
I've incorporated all of my clearance finds into our basement bathroom, along with a few other deals from other stores. Stay tuned for the bathroom reveal!
Monday, November 12, 2012
A Case of Blog Abandonment
I realize I have been neglectful of my blog for the past several...um, months?! Has it really been that long? In my defense I have been busy with the 7.5 credit hours of interior design classes, working 40-plus hours a week, and squeezing in a few birthday celebrations here and there. I'm full of excuses. I think I am ready for life to calm down a little. I know this is wishful thinking considering the holiday season is upon us, but a girl can hope, right?
The Fall quarter is soon coming to a close. I present one of my final projects tomorrow night, and the second a week from tonight. Here are a few shots of my townhouse design that I am presenting tomorrow (sorry for the crappy cell phone pics):
As much as I have enjoyed and learned from these two courses, I am ready for a break. Going to school and working is WAY harder than I ever expected, even if you are taking classes you love. Not only have I been neglectful of the blog, our house has seen better days as well.
I feel like it's time to recenter myself and refocus on home and family. Maybe it's the recent extreme change in temperature or the fact that I spent my entire weekend drawing, cutting and gluing (literally hours of gluing), but I'm ready to stay home, re-organize and relax in a cozy home with the hubby and the puppy.
Tonight while in class I selfishly thought I would take another class this Winter quarter. I have been wavering about this for some time now. I'm writing this post in part to talk myself out of this crazy idea. Yes, this is the only time of year that Interior Design II is offered, and yes, I would like to continue to take classes with some of the people I have met, but I realize now it will be too much too soon. Like I have said before, I am not after a degree at this point, so there's no rush.
So that's that. No class next quarter. It's in writing now, that makes it official, Charlotte.
Thank you for listening to my inner dialog and holding me accountable to my decision. I have a few posts I have been holding out on including a dresser update, a Goodwill shopping trip, a Target clearance jackpot, and a basement bathroom makeover. Stay tuned to more projects and holiday decorating!
The Fall quarter is soon coming to a close. I present one of my final projects tomorrow night, and the second a week from tonight. Here are a few shots of my townhouse design that I am presenting tomorrow (sorry for the crappy cell phone pics):
As much as I have enjoyed and learned from these two courses, I am ready for a break. Going to school and working is WAY harder than I ever expected, even if you are taking classes you love. Not only have I been neglectful of the blog, our house has seen better days as well.
I feel like it's time to recenter myself and refocus on home and family. Maybe it's the recent extreme change in temperature or the fact that I spent my entire weekend drawing, cutting and gluing (literally hours of gluing), but I'm ready to stay home, re-organize and relax in a cozy home with the hubby and the puppy.
Tonight while in class I selfishly thought I would take another class this Winter quarter. I have been wavering about this for some time now. I'm writing this post in part to talk myself out of this crazy idea. Yes, this is the only time of year that Interior Design II is offered, and yes, I would like to continue to take classes with some of the people I have met, but I realize now it will be too much too soon. Like I have said before, I am not after a degree at this point, so there's no rush.
So that's that. No class next quarter. It's in writing now, that makes it official, Charlotte.
Thank you for listening to my inner dialog and holding me accountable to my decision. I have a few posts I have been holding out on including a dresser update, a Goodwill shopping trip, a Target clearance jackpot, and a basement bathroom makeover. Stay tuned to more projects and holiday decorating!
Monday, September 3, 2012
Hitting the Books
Tomorrow I start back to school. No, not to study nursing or even anything health
care related. I am going back to school
for interior design!
A local community college here in Omaha offers an Interior Design program, and
I have decided to take two introductory classes to see if it is something I am
interested in pursuing. Back when I
started my undergraduate degree at UNL I briefly debated between Interior
Design and Nursing. My practical side
won out, and now I have been a nurse for almost 5 years.
After debating about applying to graduate school, I decided
to hold off and try dabbling in interior design.
I’m not sure what my intentions are exactly, but here is what I hope to
get out of these classes:
I want to have a better understanding of what is involved in
actually “designing” a room, not just decorating.
I want to see if interior design is an area I would be
interested in pursuing as a career.
I want to try interior design before committing myself to
graduate school in a health-care related field.
I want to take a class that is fun and interesting, in a
subject that I am truly passionate about.
And now to answer a few “frequently asked questions” that I
have already received from family and friends:
Are you after a degree?
I don’t know, maybe?
We will see how these first two classes go.
Are you leaving nursing?
No. I am still
working full-time as a nurse, just taking two night classes for the Fall
quarter. I have no intention of leaving
nursing at this time.
Are you crazy? Taking
two night classes until 10:00pm after working, isn’t that a lot?
Maybe. But I am
hoping that going to class for something that I am truly passionate about will
make going to class and doing homework a little easier. Right now there’s no real intention for a
degree so there’s no pressure, just fun!
I can honestly say I have never been this excited in anticipation of starting
school. I mean, buying school supplies
is always thrilling (new colored pencils? yes please!), but actually thinking about attending class has never had this
effect on me. Hopefully I am not setting
my expectations too high, but really, I don’t know if I have too many
expectations to begin with. Now I am
just rambling.
Currently I am tying up a few loose ends with projects from
the long weekend, so I hope to post a few updates soon! Happy Labor Day, all!
Sunday, August 26, 2012
Craigslist 101
Craigslist is a goldmine, if you know how to use it.
I feel like I am about to reveal some sort of secret that once out will
deplete my precious online resource, but I have decided to spill it anyhow to
show you that design can be affordable if you are willing to put in a little time
and elbow grease.
I’m assuming if you are at all online savvy and found your
way to my blog that you are familiar with the concept of Craigslist. It’s a free online listing service where you
can post items for sale, amongst other services. But let’s just stick to the “For Sale”
section shall we?
I am constantly scouring Craigslist when I have a “project”
idea in mind, meaning I search sometimes two or three times a day. This may sound time consuming, but if you
have figured out your search parameters then it helps narrow down the field and
search time.
In the past we have scored the following with the help of
Craigslist:
My husband’s (former) car from Las Vegas.
My car from Denver.
My husband’s new car from Kansas City.
This Steelcase office chair for $5 in Omaha that I reupholstered.
This butcher block counter top for $60 in Omaha that I refinished.
Recently (as in the last year) I have been on the hunt for a
mid-century modern style dresser for our bedroom. In past months I would search for dressers
maybe once a week, but always came in a little too late. Either I would hesitate and think about it
for a few days, or I was calling several days after the dresser was
posted. This lead to heartbreak on many
occasions as the “perfect” dresser was already gone. But the magic of Craigslist is that another
“perfect” dresser always comes along, something that my husband had to
frequently remind me of.
One particular incident a few weeks ago finally pushed me to
search every day until I had my dresser.
The dresser was $40, gorgeous, and I had a time set after work with the
seller to buy it. While at work I
received a “SOLD IT!” email from the seller…I was more than disappointed, I was
mad.
From that day on I searched nearly every day for the
following: “dresser” in “Furniture by
owner” with image.
Last week I found two promising specimens. One was a Broyhill Brasilia dresser listed
for $575. This may seem like a lot for
an old dresser, but this line often sells for over $1000 on EBay. I tried convincing the husband, and myself,
that this was the perfect investment piece dresser. Thankfully, he didn’t cave and kindly
reminded me that I will find another more affordable dresser that I would love.
A few days after my heartbreak I spotted another potential
dresser listed for $150. Based on the
pictures it was difficult to tell if this was indeed “the dresser”. But I didn’t waste any time and I emailed the
seller that I was interested. I heard
back right away, arranged a time on Thursday night to look at the dresser, and
then I wasn’t able to make it. But
miracle of miracles, the seller emailed me on Friday and said the dresser was
mine for $50 if I could pick it up that night.
So with the help of our good friend Dan and his truck, we finally have
our mid-century dresser.
Isn’t it a beaut? It
has a few scratches and water marks from cups, but with a little refinishing I
think it will really shine!
For those of you novice Craigslisters I would offer the
following tips:
1) Figure out key words for your search terms. I searched “dresser” but also, “midcentury” “mid-century” “mid century” and “Danish”.
2) Limit your search to posts containing an image. With no picture, you really have little clue of what you are getting yourself into and will likely waste your time going to look at it.
3) Search for “by owner”. This eliminates all of the dealers out there selling those awful 7 piece furniture sets. They always include popular search phrases in their descriptions so they will pop up with almost any search you perform.
4) Don’t let bad photos fool you. You are not looking for perfection. Look instead for good bones (i.e. solid wood, dovetail joints, functioning drawers). Minor imperfections can be fixed.
5) Act immediately. Send an email or call if there is a phone number listed. Don’t offer to purchase the piece, but say that you would like to arrange a time to stop buy and take a look. You can always back out once you see it in person.
6) If the posting is vague, ask additional questions or for more pictures. Depending on the item and the price he seller may be more or less inclined to answer your questions or provide pictures. If the item is selling for $10, they probably just want to get rid of it and won’t bother answering.
7) If you are traveling out of town and have been looking for a particular item (i.e. car) search Craigslist in that city before heading there. Often you can arrange a day and time before heading there and find out where the item is located if you are unfamiliar with the city.
8) Do your research. If you are looking for something antique Google it to see what they typically sell for on EBay or other sites. Use this to your advantage when haggling a price if the item is overpriced. A lot of items are overpriced on Craigslist, which people eventually realize when their stuff doesn’t sell.
9) Use imperfections to your advantage when deciding on a price. Point out to the seller that you will have to do some refinishing.
10) Carry the right amount of cash with you, but separate out enough for just your starting offer. Don’t pull out a wad in front of the seller, but then only offer them half.
1) Figure out key words for your search terms. I searched “dresser” but also, “midcentury” “mid-century” “mid century” and “Danish”.
2) Limit your search to posts containing an image. With no picture, you really have little clue of what you are getting yourself into and will likely waste your time going to look at it.
3) Search for “by owner”. This eliminates all of the dealers out there selling those awful 7 piece furniture sets. They always include popular search phrases in their descriptions so they will pop up with almost any search you perform.
4) Don’t let bad photos fool you. You are not looking for perfection. Look instead for good bones (i.e. solid wood, dovetail joints, functioning drawers). Minor imperfections can be fixed.
5) Act immediately. Send an email or call if there is a phone number listed. Don’t offer to purchase the piece, but say that you would like to arrange a time to stop buy and take a look. You can always back out once you see it in person.
6) If the posting is vague, ask additional questions or for more pictures. Depending on the item and the price he seller may be more or less inclined to answer your questions or provide pictures. If the item is selling for $10, they probably just want to get rid of it and won’t bother answering.
7) If you are traveling out of town and have been looking for a particular item (i.e. car) search Craigslist in that city before heading there. Often you can arrange a day and time before heading there and find out where the item is located if you are unfamiliar with the city.
8) Do your research. If you are looking for something antique Google it to see what they typically sell for on EBay or other sites. Use this to your advantage when haggling a price if the item is overpriced. A lot of items are overpriced on Craigslist, which people eventually realize when their stuff doesn’t sell.
9) Use imperfections to your advantage when deciding on a price. Point out to the seller that you will have to do some refinishing.
10) Carry the right amount of cash with you, but separate out enough for just your starting offer. Don’t pull out a wad in front of the seller, but then only offer them half.
Now I admit that I am HORRIBLE at haggling prices. The Broyhill Brasilia dresser? I totally would have paid the $575 they were
initially asking since I saw that they commonly sell for twice that
amount. Luckily with the dresser we came
home with I didn’t even have to haggle.
The seller dropped the price on his own by $100 and $50 was a fair
price, no haggling needed there.
My husband on the other hand is never afraid of negotiating
a good deal. I think with me I’m just
afraid of offending the seller? Or maybe
I just hate confrontation? Either way,
it makes me uncomfortable. But that is something
that I will continue to work on with my future Craigslist ventures.
Monday, August 13, 2012
Presidential Inspiration
Being that it is an election year I find it rather fitting
that my most recent source of interior design inspiration comes from a former
president. He currently resides in our
basement.
Yes my friends, I am speaking of the infamous Nixon bowling
photo. In case you are unfamiliar with
this masterpiece allow me to introduce you.
This photo was taken during President Nixon’s term in office
in 1970 in the Old Executive Office Bowling Alley. It was made famous by the movie “The Big
Lebowski” where The Dude, an avid bowler, has this photo in a sort of shrine sitting
above his bar where he concocts his White Russians.
| http://thedroidyourelookingfor.files.wordpress.com/2011/02/lebowski-nixon1.jpg |
Since this is my husband’s all-time-favorite movie, I
decided to buy this poster as a Christmas gift for him a few years back knowing
that I would have to hang it in our house.
At first, I cringed a little putting it up on our wall. But I can honestly say that I have grown fond
of Mr. President over the last few years.
So much so, that I realized recently I want to design the basement
around him.
I had an epiphany the other week. This picture is perfect. It has exactly what I am looking for in a
“loungy basement”. Allow me to explain
to you skeptics.
The color combination is perfect: brown, gray, and indigo with pops of
red. I already have the brown, gray and
red going on in the basement, but I feel like it was missing something. Indigo blue.
This is the perfect slightly unexpected accent color.
I am also totally digging the loungy late 1960’s vibe that
this photo exudes. The red chair =
perfection! And I cannot say enough
about the awesome graphic wallpaper in the background.
I can tell you now that this does not mean that I will
install a bowling alley, hang blue pattered wallpaper and buy a red chair to
match the one in the photo. This is
purely for inspiration. Here is how I
plan on incorporating a little more Nixon in our basement:
1) Find
Mid-Century style furniture pieces.
2) Use
bold graphic patterns.
3) Keep
the gray paint and deep brown wood tones we currently have but add more pops of
red and indigo blue.
4) Keep
it fun and kind of quirky. Let’s face
it. This is an entertainment room. It is supposed to be a fun and relaxing area. I don’t want people to feel like they can’t put
their feet up and have a good time.
So what do you think?
Am I crazy? Can you picture it
like I can? We will see how my Nixon
vision evolves in the coming year.
Sunday, August 12, 2012
Going Vertical
I did it again. I
gutted another poorly designed closet in our 70-year-old house. As I have mentioned before old homes
notoriously have small closets. Not only
are they small, but they in no way take advantage of the tiny amount of space
allotted to them in the first place.
Since our master bedroom closet overhaul last year I have been dying to
get my hands on our disaster of a “coat closet”.
Technically, our house does not have an official coat
closet. I installed coat hooks by our
front door, which we use to rotate our regularly worn seasonal items.
To store the rest of our coats, jackets,
hats, gloves, boots, and bags we took over our guest bedroom closet since it is
located on the first floor of our home.
Over the last four years it has started to look a little something like
this…
Horrible. Not
only is it difficult to find a matching pair of gloves, all of our many bags,
backpacks and boots have melded into one giant pile on the floor making it
impossible to find what you are looking for.
A few weeks back the organizing bug hit me again. I was trying to clean our living room and
could not find the space to shove yet another backpack into the closet. I had enough!
So the closet purging began. This
is everything that it contained.
After the purge, I began to take inventory of what we had,
what we could move to other locations in the house, and what we could
donate. We decided that we wanted this
closet to only contain the following:
Coats
Jackets
Hats
Scarves
Gloves
Boots
Bags
Backpacks
Picnic Items
I took measurements after the purge of the closet, as
well as some of the items I knew we needed to make room for. Using Paint I created a rough diagram so I
could explain my vision to the hubby and get the final approval.
After getting his input and blessing I got to the fun
part…the demolition! I knew this closet
would likely be constructed the same way as our master, so I collected the
necessary tools: gloves, sturdy shoes, a pry-bar, and a large hammer.
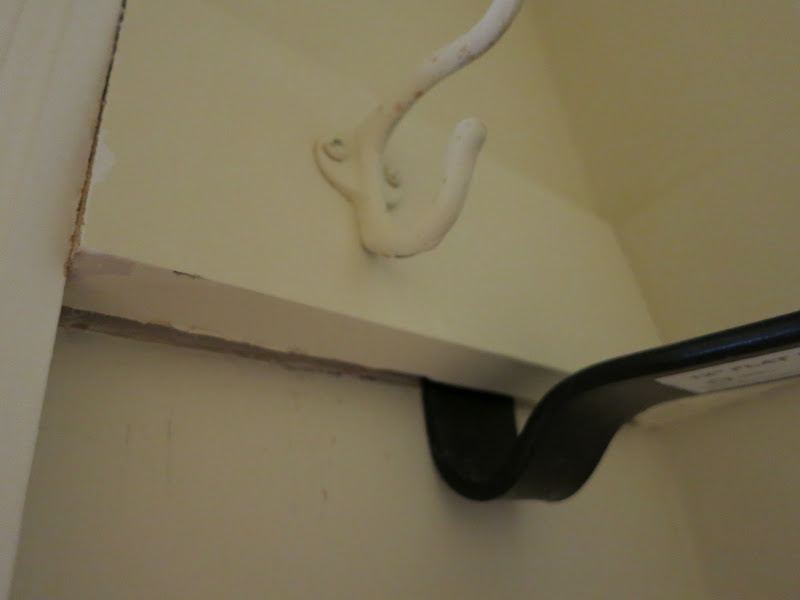
The closet had boards nailed around the perimeter with hooks
and the rod attached. Using the pry-bar
I loosened up the boards from the wall and removed any remaining nails with a
pair of pliers.
After all of the shelves
and boards were removed I started spackling to create a slightly smoother
surface.
I like to use the DAP Drydex Dry Time Indicator
spackle. It goes on pink and then turns
white when it is dry. Once everything
was white, I lightly sanded over the spackle to smooth everything out. I was not going for perfection here, as this
is a closet after all. Another little
tip, have your shop vac in one hand and the sanding paper in the other. This cuts down on the dust floating around to
all areas of your house. Trust me…it
gets everywhere!
After the sanding was complete I started cutting in with the
paint. I decided to go with a muted
turquoise, “Yucca Plant” from Martha Stewart’s line at Home Depot, the same color I had used for the kitchen pantry. Luckily I had enough left over so I didn’t
have to buy paint, always a good thing!
While the paint was drying I took a trip over to Lowes to
pick up the necessary closet supplies. I
got a closet rod and mounting brackets, a melamine shelf which I had cut in two
to size, four shelf brackets and a longer pull chain for the light. The total for all of the supplies came in
just under $40.
Once home, I started hanging the closet rod and the
shelves. I always use the heavy-duty
anchor screws anytime I have to mount anything on our walls. We have the old plaster and lathe walls,
which makes it nearly impossible to find the studs using our stud finder. So far, we have had really good luck using
this method and everything is staying put.
| Winston, "helping" as always. |
After all of the hardware and shelves were in place, I
started reintroducing our items into the closet. We did pare down some of our coats and
jackets, as well as a few bags. Here is
the final product!
The first row contains all of our boots and I left room in
case any taller boots join in in the future.
For the next row I used these three IKEA PJAS baskets I
picked up on my last trip up to Minnesota.
I filled these with winter hats, gloves, and baseball caps.
The third row contains all of our various bags, backpacks,
laptop cases, and picnic items. I had
thought about hanging hooks around the wall of the closet for bags, but quickly
realized we would run out of hooks. This
shelf is just the perfect size for all of our bags and the shelf height makes them
easily accessible.
The final row is obviously our coats and jackets as well as
our IKEA Komplement scarf hanger.
I am really happy with the outcome. I like to take advantage of the vertical
space in closets as much as possible and it worked really well to just move the
closet rod up in this case.
My mom already asked if we could reach the closet rod. Thankfully I am just tall enough at 5’4’’ to
hang any coats. Any future vertically
challenged homeowners might have to lower the rod, or get one of those handy
reaching sticks they have in department stores.
I always thought it would be fun to own one of those.
Thanks for stopping by!
Hopefully as work eases up in the near future I will have time for more
projects and more posts!
Subscribe to:
Posts (Atom)